Showing posts with label Droid2. Show all posts
Sunday, June 29, 2014
Meet the Makers Weekend at the Discovery Science Center - Day 2
Today was Day 2 of Meet the Makers weekend at Discovery Science Center in Santa Ana, CA.
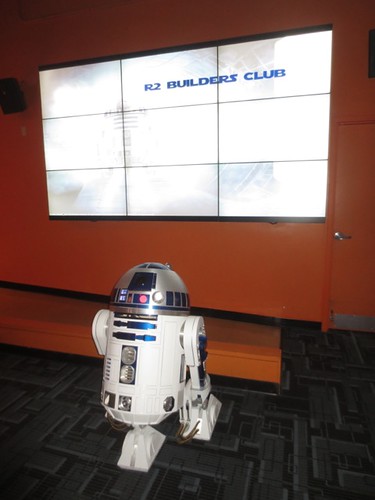
I brought droid #2 out again, but this time he was configured as R2-D2, rather than R5-D4, since I was the only builder that brought a full droid today. Maddy joined me with her R2 dome.
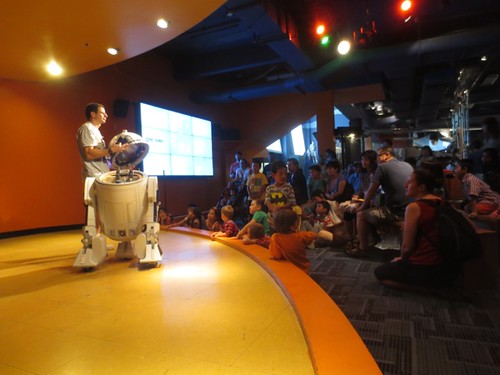
At 12:45pm I did the first of two presentations that were well-attended (thanks to Maddy for help with the pics).
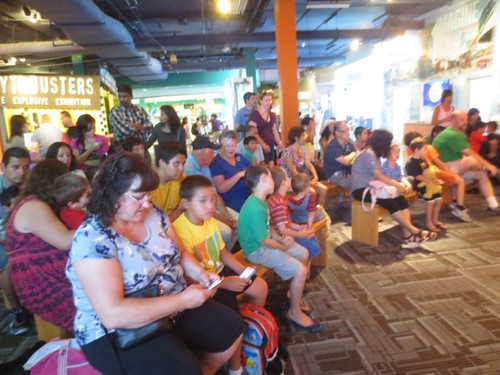
In between presentations, I took R2 into the Mythbusters exhibit.
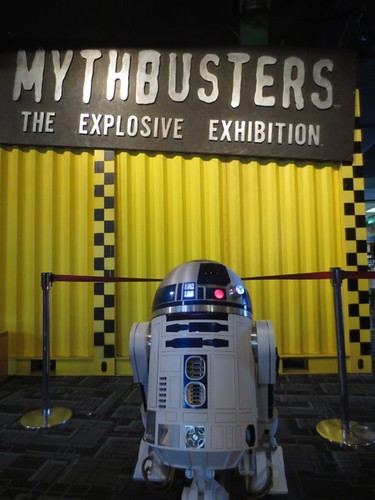
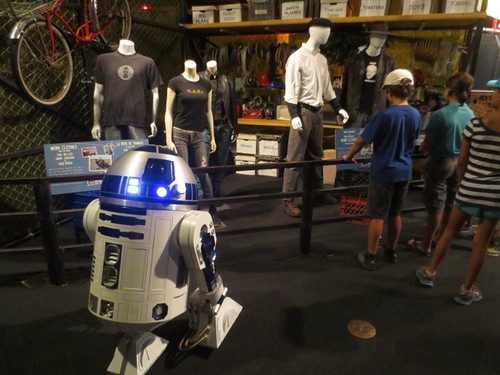
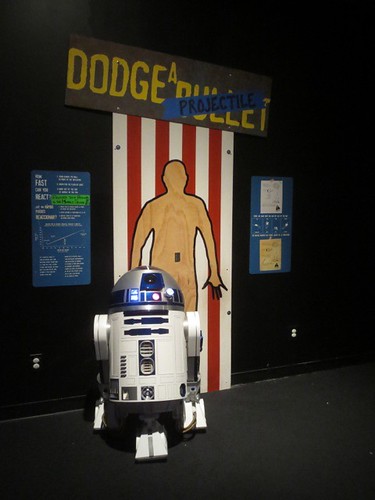
I also talked to folks, answered questions, and R2 did the usual picture posing.
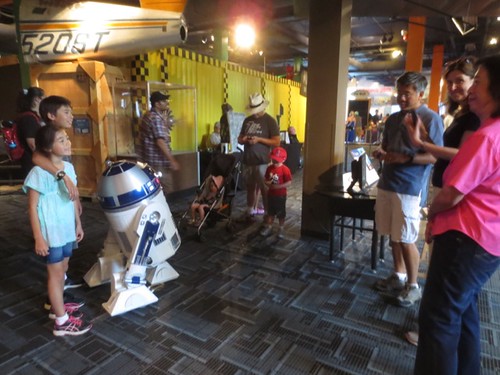
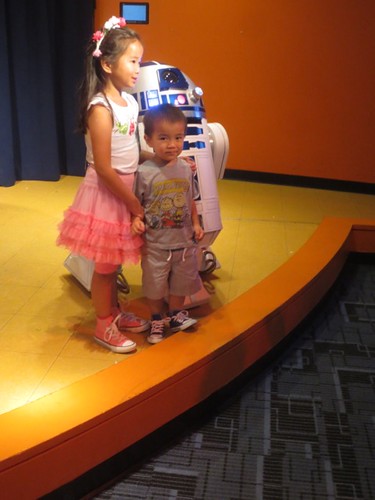
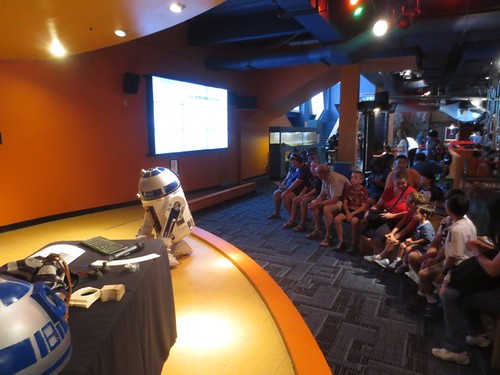
At 2:45pm R2 took the stage for the second presentation. I took the back door off ahead of time to show the insides of the droid.
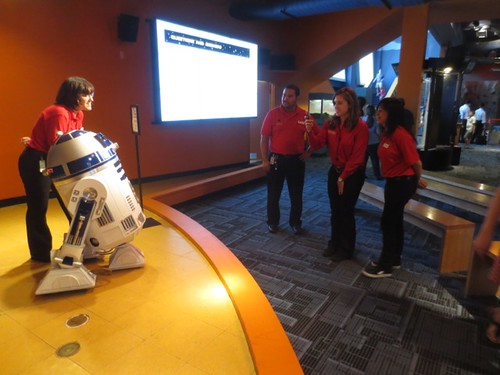
After I was done for the day, some of the staff took pictures.
And that was a wrap! Another good weekend at Discovery Science Center.
I brought droid #2 out again, but this time he was configured as R2-D2, rather than R5-D4, since I was the only builder that brought a full droid today. Maddy joined me with her R2 dome.
At 12:45pm I did the first of two presentations that were well-attended (thanks to Maddy for help with the pics).
In between presentations, I took R2 into the Mythbusters exhibit.
I also talked to folks, answered questions, and R2 did the usual picture posing.
At 2:45pm R2 took the stage for the second presentation. I took the back door off ahead of time to show the insides of the droid.
After I was done for the day, some of the staff took pictures.
And that was a wrap! Another good weekend at Discovery Science Center.
Saturday, June 28, 2014
Meet the Makers Weekend at the Discovery Science Center - Day 1
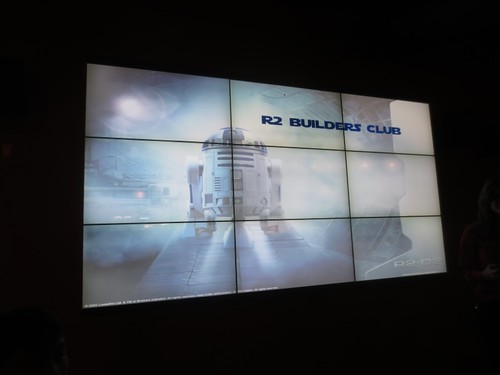
Today the R2 Builders came out to the Discovery Science Center in Santa Ana, CA, for their Meet the Makers weekend. The center was also hosting an entertaining Mythbusters exhibit.

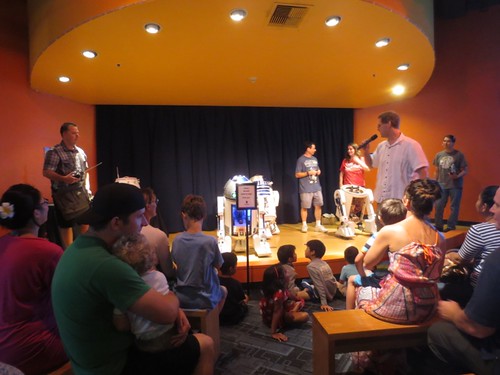
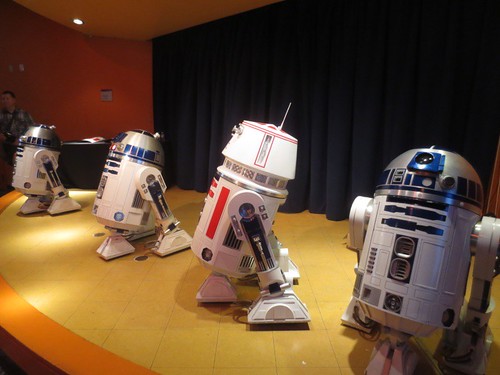
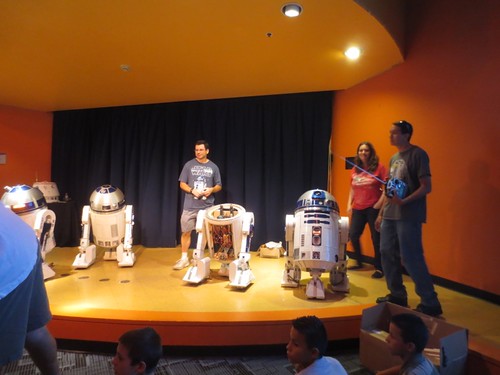
I brought droid #2 out for this one. Today he was dressed as R5-D4, although tomorrow I plan to have him change back to R2-D2. We were joined by Todd Gottfried, Roy Powers, Matthew Henricks and Maddy Lazerson, and their droids. We got set up and started doing our thing at noon.
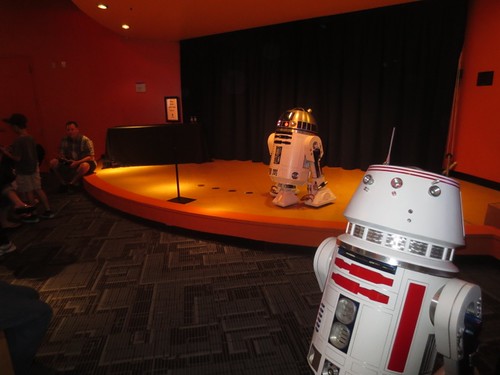
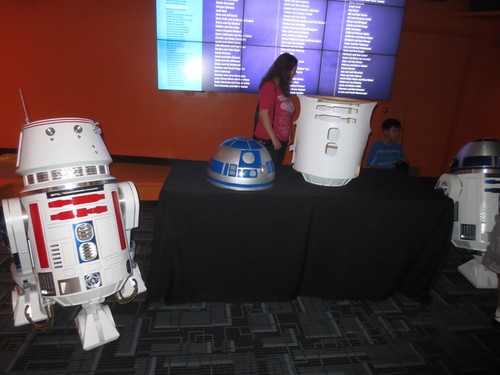
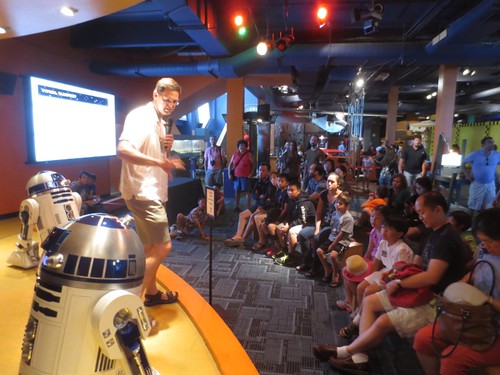
At 12:45 I gave the first of our two presentations (no pictures for that). At 2:45 Matthew gave our second talk. For both talks all the R2 Builders took questions.
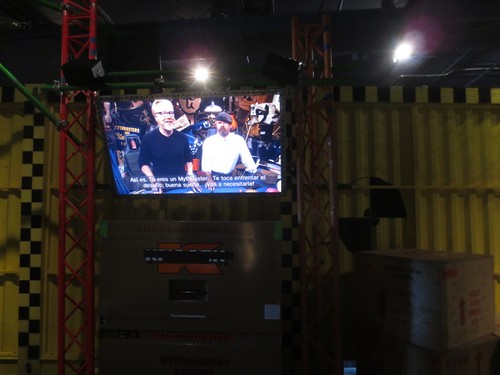
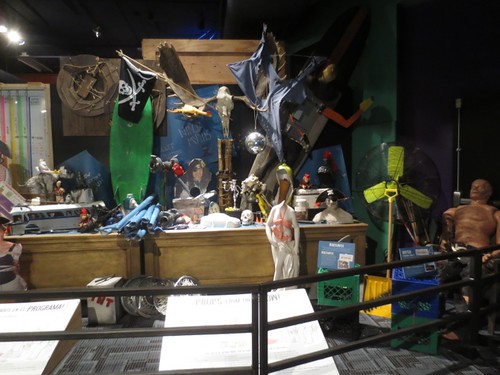
I also visited the Mythbusters exhibit, which featured props from the show as well as interactive stations, including one exploring the chemical contents of human flatulence (now there's and idea for an 8th grade science project).


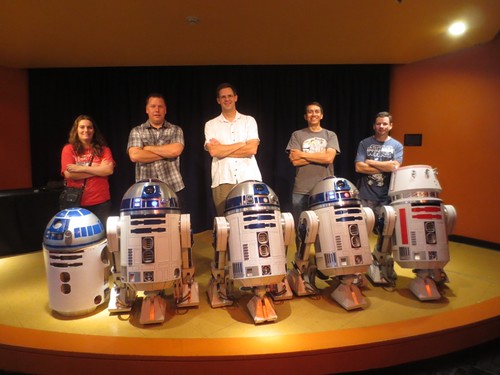
We wrapped up with a group picture, and then called it a day.
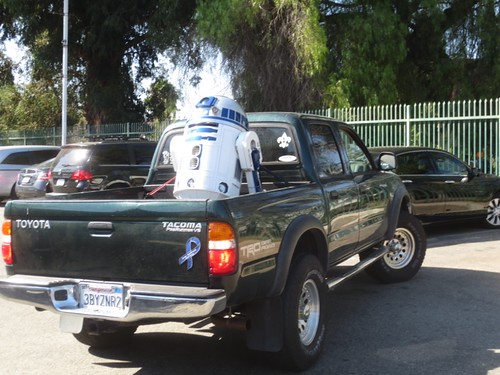
Matthew's droidmobile is a bit more open-air than mine.
I do it all again tomorrow.
The full photoset is here.
I brought droid #2 out for this one. Today he was dressed as R5-D4, although tomorrow I plan to have him change back to R2-D2. We were joined by Todd Gottfried, Roy Powers, Matthew Henricks and Maddy Lazerson, and their droids. We got set up and started doing our thing at noon.
At 12:45 I gave the first of our two presentations (no pictures for that). At 2:45 Matthew gave our second talk. For both talks all the R2 Builders took questions.
I also visited the Mythbusters exhibit, which featured props from the show as well as interactive stations, including one exploring the chemical contents of human flatulence (now there's and idea for an 8th grade science project).
We wrapped up with a group picture, and then called it a day.
Matthew's droidmobile is a bit more open-air than mine.
I do it all again tomorrow.
The full photoset is here.
Saturday, May 17, 2014
9 Volt Regulator for Amplifier on Droid #2
Today I finally got around to a minor task for droid #2, regarding his sound system.
I'm using a Radio Shack audio amplifier that runs on 9 volts. Until now, I've been using a small 9 volt battery that resides inside the amplifier for its power. There are a number of disadvantages to this:
� The battery requires me to separately turn on and off the amplifier when I power up and down the rest of the droid.
� To get to the amplifier power dial, I need to remove the dome.
� I'm prone to forgetting it's on, thus running down the battery.
The solution is to use the amplifier's power adapter connection, that takes 9 volts DC in. Since my droid runs on a 12 volt power supply, I need to use an LM7809 voltage regulator to convert 12 volts to 9 volts.
The left pin is the 12 volt input pin, and gets connected to the 12 volt positive terminal strip. The center pin is ground, and gets connected to the ground bolt. The right pin is the 9 volt output pin, and gets connected to the positive input to the amplifier.
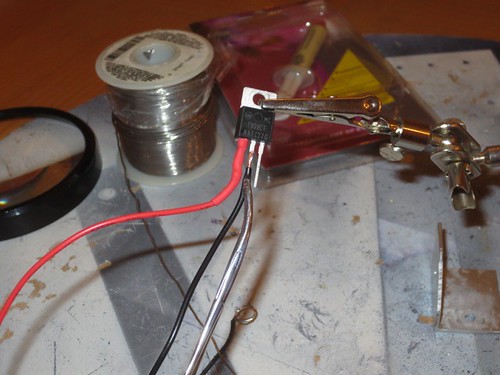
I added some thermal paste to the back of the regulator, before attaching it to the segment of aluminum angle bracket that I'm using as a heat sink.
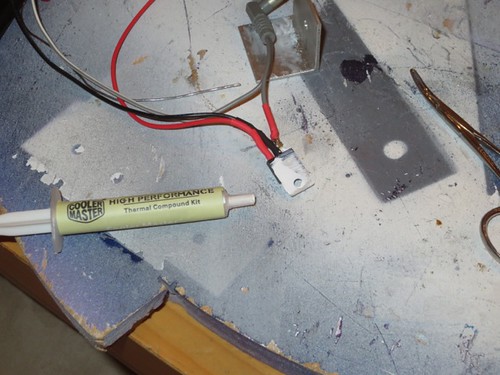
Time to test it out in the droid!
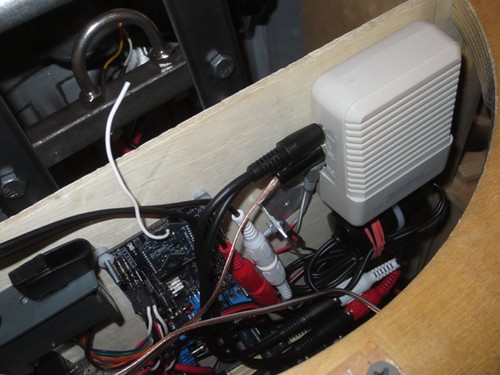
It works! Now I can run without a battery in the amplifier, and use just a single on/off switch in the droid.
I'm using a Radio Shack audio amplifier that runs on 9 volts. Until now, I've been using a small 9 volt battery that resides inside the amplifier for its power. There are a number of disadvantages to this:
� The battery requires me to separately turn on and off the amplifier when I power up and down the rest of the droid.
� To get to the amplifier power dial, I need to remove the dome.
� I'm prone to forgetting it's on, thus running down the battery.
The solution is to use the amplifier's power adapter connection, that takes 9 volts DC in. Since my droid runs on a 12 volt power supply, I need to use an LM7809 voltage regulator to convert 12 volts to 9 volts.
The left pin is the 12 volt input pin, and gets connected to the 12 volt positive terminal strip. The center pin is ground, and gets connected to the ground bolt. The right pin is the 9 volt output pin, and gets connected to the positive input to the amplifier.
I added some thermal paste to the back of the regulator, before attaching it to the segment of aluminum angle bracket that I'm using as a heat sink.
Time to test it out in the droid!
It works! Now I can run without a battery in the amplifier, and use just a single on/off switch in the droid.
Sunday, May 4, 2014
Finished Drilling New Shoulder Discs to Fix Lean Problem for Droid #2
Today I celebrated a good portion of Star Wars Day working to get droid #2 to lean at the proper 36 degree angle. (I also fixed a motor keystock problem I mentioned a few days ago.) May the Fourth be with me.
One thing I realized is that the holes in the vertical bar through which the U-bolt passes were not well-aligned with the gas pipe that the U-bolt circumscribes. This caused the U-bolt to not be perpendicular with the vertical rail and gas pipe. I used the Dremel with a grinding bit to widen these holes.
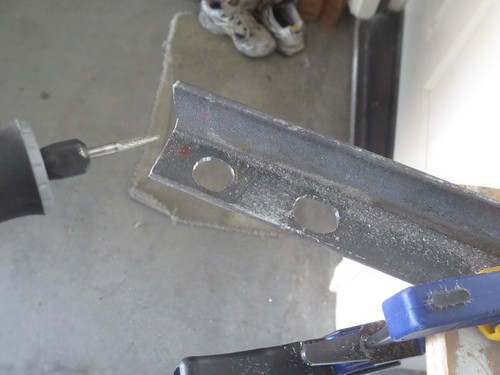
Now the U-bolt fits properly around the gas pipe, and also passes through the holes in the vertical rail in a perpendicular fashion. Note that the vertical rail is flush against the flat spot I filed on the gas pipe.
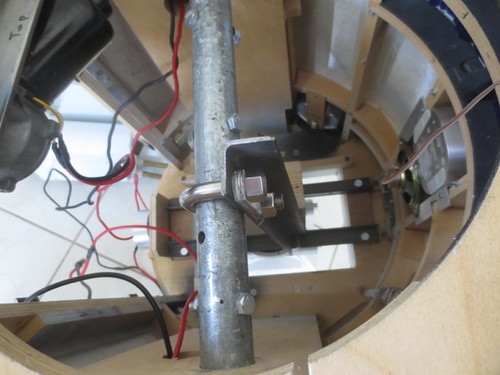
This doesn't fix the problem with R2 leaning too far back, though. Just how far is he leaning, anyway?
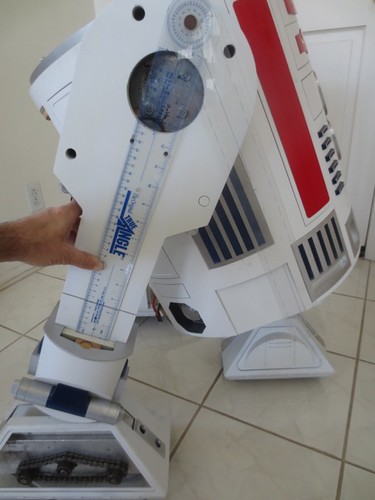
Looks like about 44-45 degrees. He should be leaning 36 degrees, so he's leaning a good 8-9 degrees too far back. This is because I didn't file the flat spot on the gas pipe in the proper location.
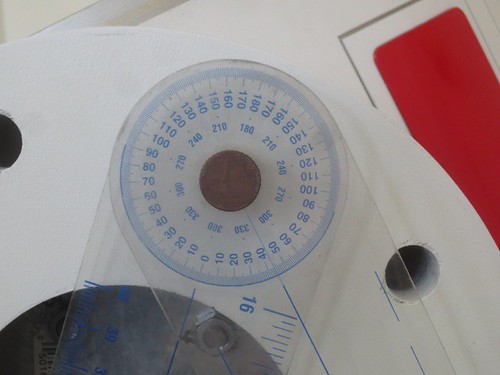
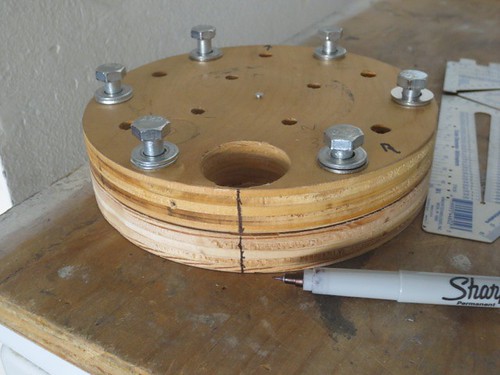
The last few days I thought about how to fix this, and decided to cut new shoulder discs, where the flange that secures the gas pipe would be rotated from it's current position. I bolted together the outer holes of original shoulder disc and the new one, and made an alignment mark.
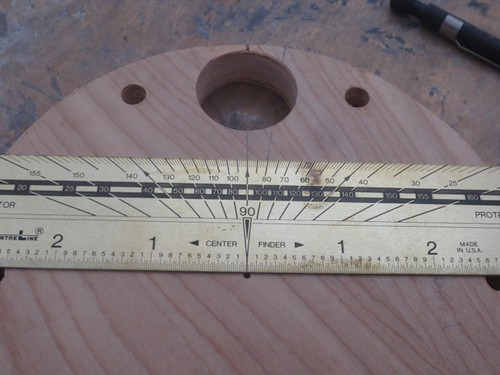
I then measured 9 degrees from this mark. I checked my measurements with four different protractors, as it was important to get this right.
I made a second alignment mark, to know where to rotate the original disc with respect to the new disc.

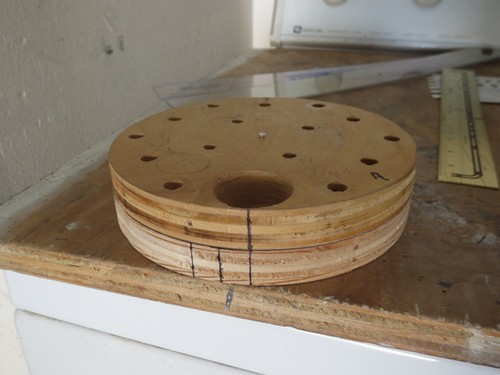
I made a third alignment mark for the other shoulder disc. The left shoulder disc was to rotate clockwise, the right disc counter-clockwise. I then stacked the first disc to be redrilled onto the original, and rotated it to the new alignment mark.
Before drilling, I quadruple-checked my logic on the actual gas pipe, to make sure everything was right, and as far as I could tell, it was.
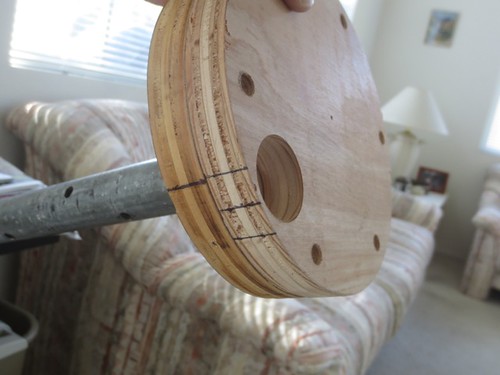
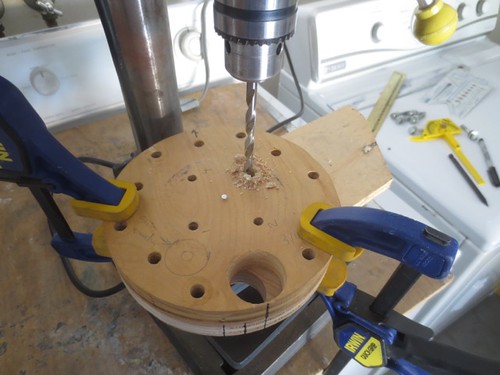
Time to drill the offset holes for the gas pipe flange. The disc is rotated nine degrees from the original.
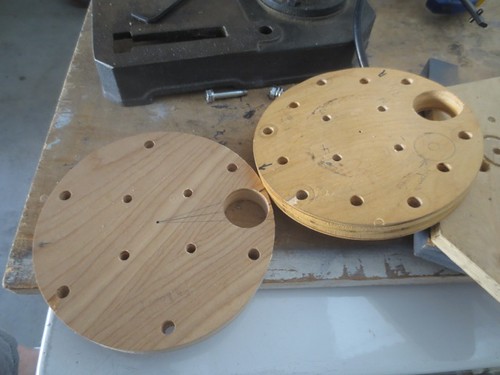
The newly drilled disc on the left, and the retired disc on the right.
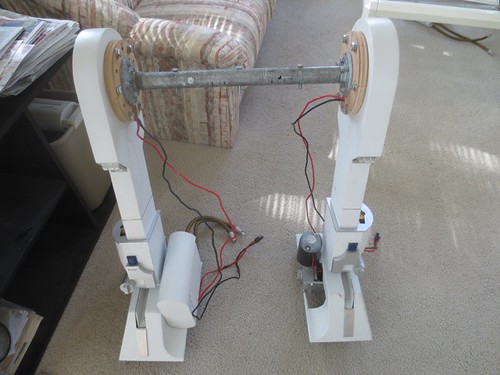
Before drilling the left shoulder disc, I wanted to sanity-check that this work had the intended effect. When the gas pipes are bolted together, the right leg should be less rotated that the left, and indeed it was. Phew!
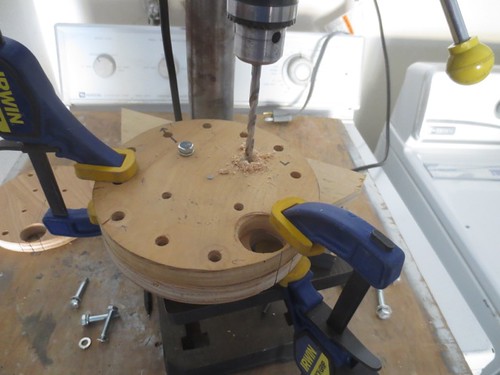
And time to drill the left shoulder disc, nine degrees offset in the opposite direction.
Everything should line up when the gas pipes are bolted together. Happily, they do. So far, so good.
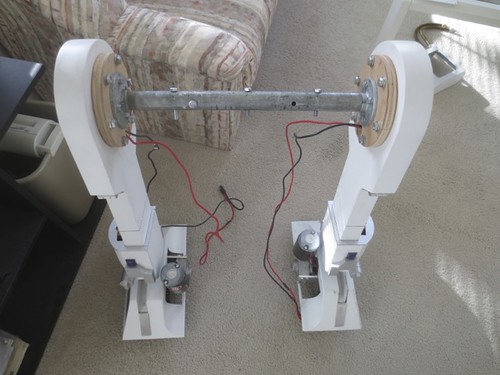
And now, the moment of truth. Time to try all this out on the actual droid.
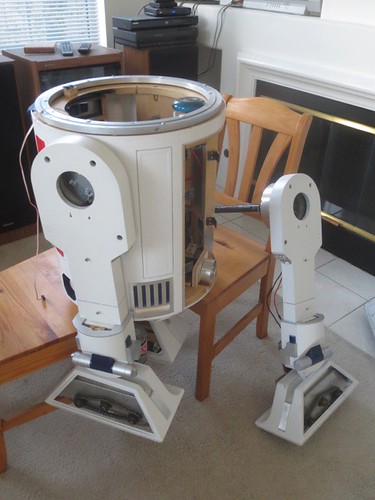
Success! Or at least, I think it is.
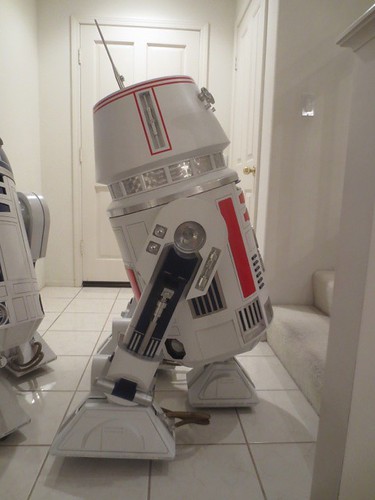
The flat spot on the gas pipe is aligned such that R2 is leaning properly now. I did some very minimal driving, and again, so far, so good. Hopefully this fixes the issue once and for all, but I need some more drive time with droid #2 before I declare complete victory.
One thing I realized is that the holes in the vertical bar through which the U-bolt passes were not well-aligned with the gas pipe that the U-bolt circumscribes. This caused the U-bolt to not be perpendicular with the vertical rail and gas pipe. I used the Dremel with a grinding bit to widen these holes.
Now the U-bolt fits properly around the gas pipe, and also passes through the holes in the vertical rail in a perpendicular fashion. Note that the vertical rail is flush against the flat spot I filed on the gas pipe.
This doesn't fix the problem with R2 leaning too far back, though. Just how far is he leaning, anyway?
Looks like about 44-45 degrees. He should be leaning 36 degrees, so he's leaning a good 8-9 degrees too far back. This is because I didn't file the flat spot on the gas pipe in the proper location.
The last few days I thought about how to fix this, and decided to cut new shoulder discs, where the flange that secures the gas pipe would be rotated from it's current position. I bolted together the outer holes of original shoulder disc and the new one, and made an alignment mark.
I then measured 9 degrees from this mark. I checked my measurements with four different protractors, as it was important to get this right.
I made a second alignment mark, to know where to rotate the original disc with respect to the new disc.
I made a third alignment mark for the other shoulder disc. The left shoulder disc was to rotate clockwise, the right disc counter-clockwise. I then stacked the first disc to be redrilled onto the original, and rotated it to the new alignment mark.
Before drilling, I quadruple-checked my logic on the actual gas pipe, to make sure everything was right, and as far as I could tell, it was.
Time to drill the offset holes for the gas pipe flange. The disc is rotated nine degrees from the original.
The newly drilled disc on the left, and the retired disc on the right.
Before drilling the left shoulder disc, I wanted to sanity-check that this work had the intended effect. When the gas pipes are bolted together, the right leg should be less rotated that the left, and indeed it was. Phew!
And time to drill the left shoulder disc, nine degrees offset in the opposite direction.
Everything should line up when the gas pipes are bolted together. Happily, they do. So far, so good.
And now, the moment of truth. Time to try all this out on the actual droid.
Success! Or at least, I think it is.
The flat spot on the gas pipe is aligned such that R2 is leaning properly now. I did some very minimal driving, and again, so far, so good. Hopefully this fixes the issue once and for all, but I need some more drive time with droid #2 before I declare complete victory.
Sunday, April 27, 2014
Cut New Shoulder Discs at Kelvin's
I've been thinking about how to fix the problem of droid #2 leaning too far back. I believe the problem is due to my filing the flat spot on the gas pipe a couple of degrees too high.
Filing a new flat spot isn't a good option, and I don't want to start over with a new gas pipe/flange assembly, especially since the pipes are JB Welded and pinned to their flanges.
Another option is to cut and drill new shoulder discs, with the outer holes used to bolt the discs to the legs staying put, and slightly rotating where the inner holes are drilled to attach the flanges to the discs.
Of course, this means exploding droid #2 to get the shoulder discs off the legs. Kaboom.

I needed to pay a visit to my friend Kelvin's house, so we could use his jigsaw and router to recut the shoulder discs.
There are four holes closest to the center, to attach the flange for the gas pipe. There are supposed to be six holes toward the outside of the disc, for bolting the disc onto the leg. On this disc, there are six extra holes that I somewhat mis-drilled and don't use. ("Those are speed holes. They make the droid go faster.") I won't be drilling the additional six holes on the new discs. Finally, there is a large hole for the motor wires to pass through.
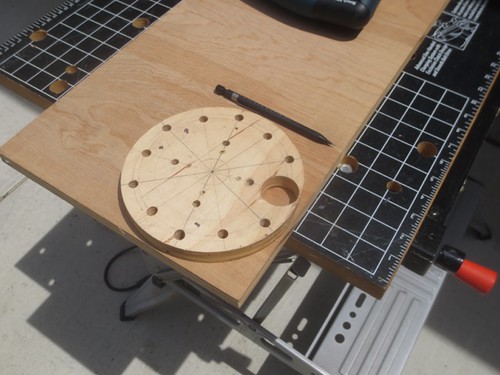
I only need two new discs, but am cutting four in case I mess up.
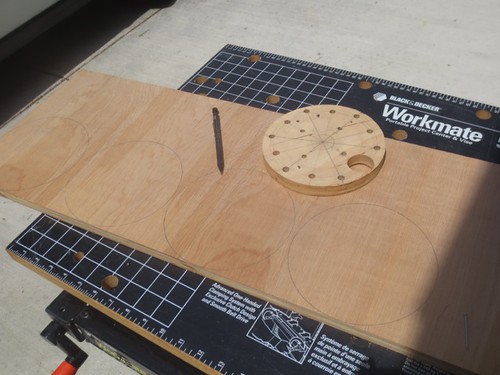
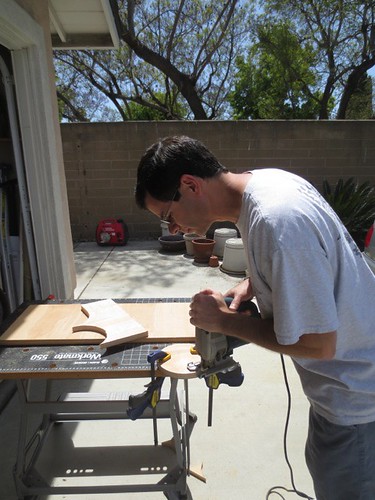
I used a jigsaw to rough cut the circles, leaving a little material just outside the perimeter line for routing to size.
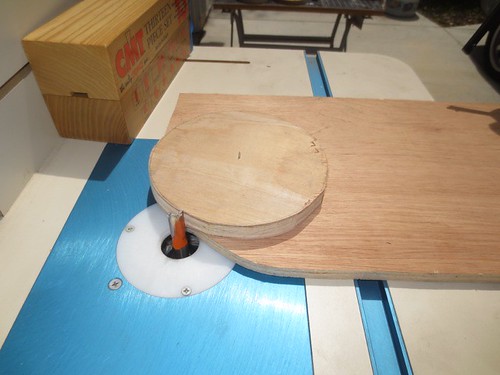
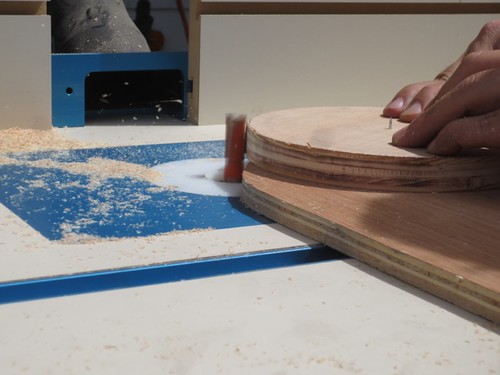
A router is used to trim the disc to the perfect diameter, using a technique Mike Senna taught me years ago. The disc spins on a nail, and as the disc is spun around, the router trims the edge flush all the way around.
The four new discs, along with their progenitor.
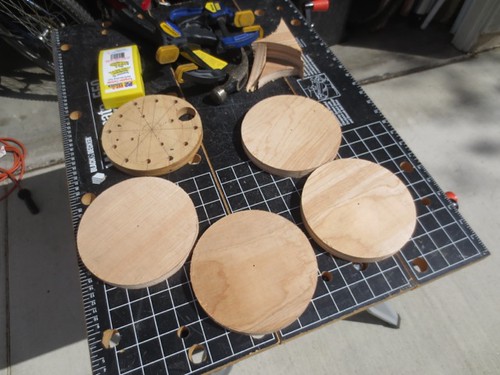
Next I need to use the original discs as drilling templates for the outer holes, and then I'll need to carefully determine how much to rotate the original discs in order to have the flat spot on the gas pipe better line up with the 36-degree tilt that R2 should have.
Filing a new flat spot isn't a good option, and I don't want to start over with a new gas pipe/flange assembly, especially since the pipes are JB Welded and pinned to their flanges.
Another option is to cut and drill new shoulder discs, with the outer holes used to bolt the discs to the legs staying put, and slightly rotating where the inner holes are drilled to attach the flanges to the discs.
Of course, this means exploding droid #2 to get the shoulder discs off the legs. Kaboom.
I needed to pay a visit to my friend Kelvin's house, so we could use his jigsaw and router to recut the shoulder discs.
There are four holes closest to the center, to attach the flange for the gas pipe. There are supposed to be six holes toward the outside of the disc, for bolting the disc onto the leg. On this disc, there are six extra holes that I somewhat mis-drilled and don't use. ("Those are speed holes. They make the droid go faster.") I won't be drilling the additional six holes on the new discs. Finally, there is a large hole for the motor wires to pass through.
I only need two new discs, but am cutting four in case I mess up.
I used a jigsaw to rough cut the circles, leaving a little material just outside the perimeter line for routing to size.
A router is used to trim the disc to the perfect diameter, using a technique Mike Senna taught me years ago. The disc spins on a nail, and as the disc is spun around, the router trims the edge flush all the way around.
The four new discs, along with their progenitor.
Next I need to use the original discs as drilling templates for the outer holes, and then I'll need to carefully determine how much to rotate the original discs in order to have the flat spot on the gas pipe better line up with the 36-degree tilt that R2 should have.
Subscribe to:
Posts
(
Atom
)


